Sensory bottles can be a calming experience for your little one. They’re great for babies, toddlers, preschoolers or any child who loves visually stimulating objects.
The great thing is you don’t have to buy them! Instead, you can save money and make them yourself at home with inexpensive materials from the store and what you already have in hand.
Once you start making sensory bottles, you’ll want to keep making them. Not only are they easy, but they’re so fun and interesting for kids of all ages!
Related: 10 Inexpensive Sensory Shakers and Noise Makers
What Are Sensory Bottles?
Sensory bottles are containers that typically include water, clear glue, and any fun materials you’d like, designed to provide a child with non-messy, sensory play and stimulation. Babies and toddlers love to shake them up and watch the objects and glitter float around as it settles to the bottom.

Benefits of Sensory Bottles
Sensory bottles have numerous benefits for kids or even adults of any age. They can provide a calming effect for any overstimulated person or even arousal for a child who is under stimulated.
Sensory bottles are good for children who have a difficult time self-regulating their emotions due to any stressor.
When the sensory bottle is shaken up and the items are moving slowly around the container, you’ll see your child become fascinated with watching the slow descent and movement. You’ll see it calm them down, help them regulate their emotions and behaviors, and put them in a state of relaxation.
If you teach your child how to use the sensory bottle before they have become overanxious or overstimulated, you’ll really see the benefit. They’ll learn that once they start to become upset, they can reach for the sensory bottle to calm them down.

Skills & Concepts Sensory Bottles Teach
While the benefits of sensory bottles typically help your child calm down, they also are a great way to expose your children to the world around them. They give kids a way to make connections and address a range of skills. You also can use these to introduce vocabulary to your child.
Here are some of the skills that calm down bottles may help reinforce.
- Counting
- Shapes
- Number Recognition
- Descriptive Language
- Phonics
- Letter Matching
- Sharing
- Sinking or Floating
- Sorting
- Predictions
What Do You Put in a Sensory Bottle?
There are many kinds of materials you can use for sensory bottles. Often, these items can be found by raiding the Dollar Store or rummaging through your house or craft bins to find small items for each bottle. That’s why they’re so easy to make, because you can usually find inexpensive items to throw in.
You can make various themes of sensory bottles, such as seasonal, holidays, or any other educational theme.
Make an orange one for Halloween with little pumpkins or a red and green one for Christmas with little trees. You can make an ocean-themed bottle blue with little fish,
You can put small letter or number beads for children learning the alphabet and counting or plastic ocean animals for a ocean life unit. See what you can come up with and get creative!
Here are some more ideas!
- Confetti
- Sand
- Beads
- Google Eyes
- TOOB Animal Sets
- Loom Bands
- Mini Erasers
- LEGOs
- Perler Beads
- Pipe Cleaners
- Marbles
- Buttons
- Sequins
- Beans
- Rice
- Dry Candy
- Water Beads
Related Post: 12 Sensory Board Ideas for Babies & Toddlers

Fun Sensory Bottle Themes to Try
When create sensory bottles for your toddler or preschooler, think about what interests your children. Are they loving a new skill like counting, or did you recently go to the beach together?
Here are some themes that are fun to create!
- Alphabet
- Beach
- Beads
- Colors
- Counting
- Dinosaurs
- Fall
- Fourth of July
- Fresh Flowers & Spring
- Halloween
- I-Spy
- LEGO
- Minions
- Nature
- Rainbow Glitter
- Spiders
- St. Patrick’s Day
- Star Wars
- Teenage Mutant Ninja Turtles
DIY Glitter Sensory Bottles
Here is a short tutorial on how to make these sensory bottles step by step. They are simple, but you can easily mess them up and have to start over again. There are also some handy tips at the bottom so you don’t make the same mistakes I did the first time that I made glitter bottles!
What You’ll Need:

- Empty bottles. I prefer Voss Bottles for the sleekest look, but you can use any clear empty water bottle r cylindrical container. These Plastic
bottles mimic the look of Voss bottles and work perfectly. - Water
- Clear glue
- Food coloring
- Glitter
- Small, colorful, lightweight items, such as these foam shapes, water beads, pompoms, stars
What to Do:
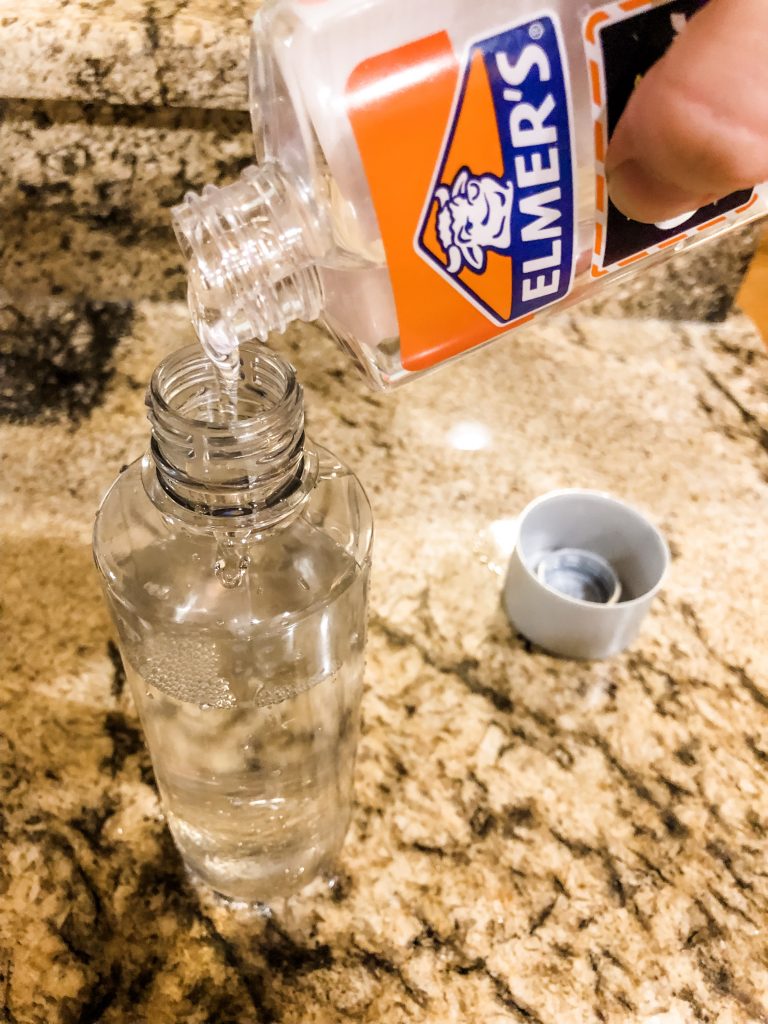
Step 1: Fill the empty water bottle
Step 2: Fill the remainder with clear glue. Don’t use white glue for sensory bottles because you want to be able to see through it. Leave a small space at the top to add the knick-knacks so it doesn’t over flow.
Step 3: Squeeze in a drop of food coloring to make the bottle whatever color you wish. GO LIGHT on the food coloring! You can always add more, but you can’t take it away. You want the water to still be light enough that you can see all of the floating items in there.
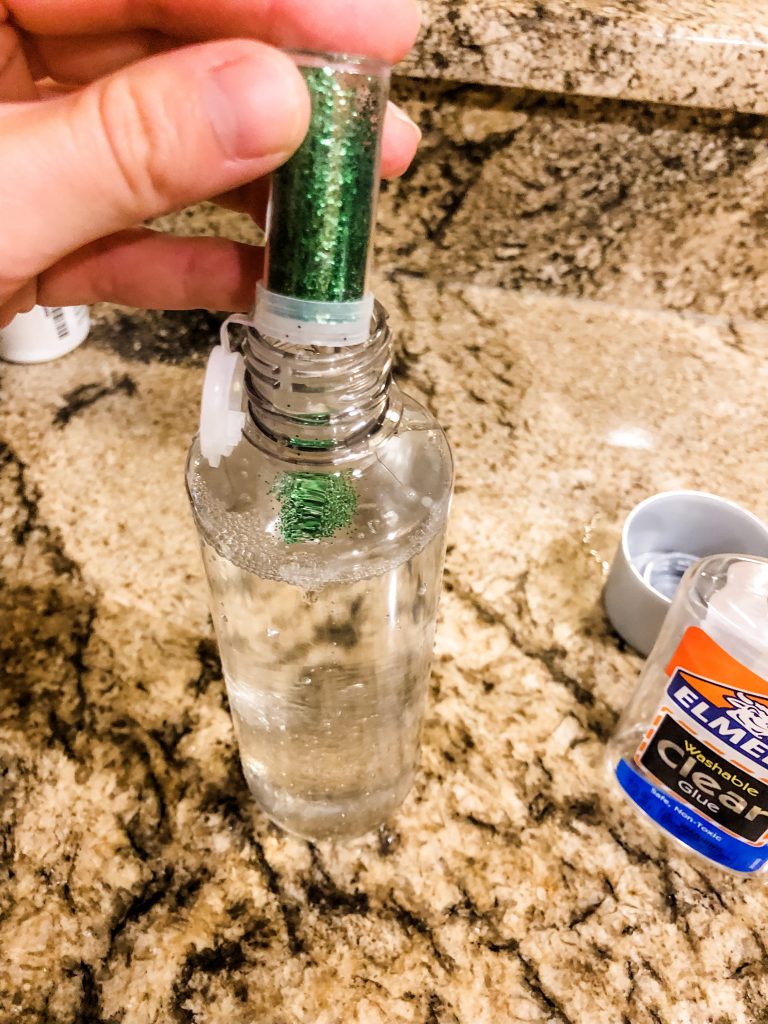
Step 4: Add some glitter and all of the fun little items. Make sure any items you use are lightweight so that they float well.
Step 5: Mix it all up and watch!
Step 6: Glue the lid shut.

Tips for Making DIY Sensory Bottles:
- A little food coloring goes a long way! Only put one small drop in at first. You can always add more. Especially with the gel food coloring, you don’t need to overdo it. If the glitter bottle becomes too dark, it’s useless because you won’t be able to see the glitter or the objects inside.
- Make sure the items that you use are not heavy or they will just drop to the bottom. If you don’t have any items that are lightweight, just stick with glitter only.
- The items will probably stick together initially. After the bottles settle ( in a few days) they will separate more.
- Make sure you SUPER GLUE THE LID SHUT, especially if you have curious toddlers. The last thing you want is your child to unscrew the top and the contents dump everywhere.
Other Liquid Ingredients for Sensory Bottles
Liquid ingredients are what make the objects or glitter inside move, and each one has a different composition. So, make sure you consider how you want the bottle to flow.
Also, keep in mind that anything metallic or magnetic will rust if you use the wrong liquid ingredients.
- Water: You can add almost anything besides magnets or metal objects because they will rust over time.
- Colored Water: All you have to do is add some food coloring or liquid watercolor to water. Easy peasy!
- Mineral or Baby Oil: Adding mineral oil will slightly slow down the objects in the bottle, such as glitter. It’s a great solution for magnets and metallic items. If you want to dye the oil, you have to use the right food dyes.
- Cooking Oil: This is affordable and works great with colored water. You can use it for science and show how water and oil separate rather than mix.
- Liquid Soap: Here is another liquid ingredient that has a slowing component. Shampoo, hand soap or dish soap all work great.
- Glycerine: This will also slow down items like glitter slightly.
- Corn Syrup: Adding corn syrup to your sensory bottles will slow down objects substantially, but the items need to be clean or they may develop mold. Corn syrup is sugar after all!
- Glue: I use glue regularly in my sensory bottles; they work great for calm-down bottles because it creates a slow falling effect. However, be a bit careful with glitter glue because it seems to work different than regular clear glue.
- Hair Gel: This gives objects a slow fall or suspended effect for their bottles. It will help dry ingredients “stay put.”
- Tonic Water: If you want a glow in the dark sensory bottle, tonic water can do that for you!
How to Make a Slow Moving Sensory Bottle
My little kids love slow moving sensory bottles; it keeps them focused as the objects move inside. Creating this slow movement requires two simple ingredients: hair gel and warm water that cools together.
Really! That’s all you need.
After it cools together, add glitter and other objects that you want. If they fall too slow, add more warm water. Add more hair gel if they fall too fast.
Hope your kids love these fun DIY sensory bottles!


Marissa is a pediatric Occupational Therapist and mom of three children. She started this website to help moms, teachers, homeschool parents, and therapists find resources and ideas to teach their young children and students through play-based learning.